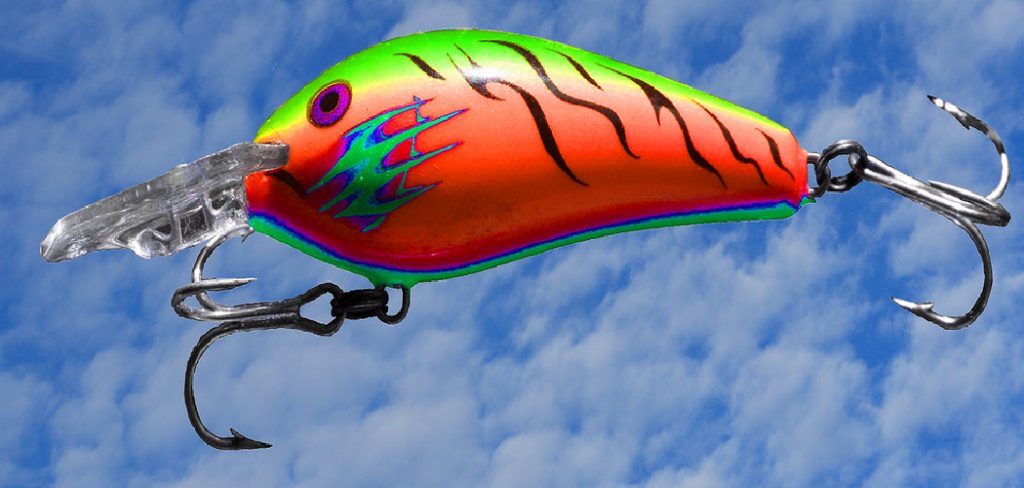
Do you want to avoid buying crankbaits at the store and need help finding the perfect lure for your fishing style? Why not make your own custom crankbaits?
How to make crankbaits can be a rewarding and creative endeavor for any angling enthusiast. Not only does it deepen your understanding of fishing techniques, but it also allows for customization, enabling you to tailor your lures to the specific environments and fish species you are targeting. Whether you’re a seasoned veteran or a curious novice, learning the intricacies of designing and constructing these enticing lures can enhance your fishing experience.
This guide will walk you through the necessary steps and materials to create effective and visually appealing crankbaits. With a bit of patience and practice, you’ll gain the skills to produce custom lures that can improve your catch rate and give you the satisfaction of crafting your own tackle.
What Will You Need?
Before diving into making crankbaits, it’s essential to gather all necessary materials beforehand. Having everything on hand will make the crafting process more efficient and enjoyable. Here is an essential list of materials you’ll need:
- Wood: Due to their lightweight and buoyant properties, the majority of crankbaits are made from balsa or basswood.
- Crankbait Templates: You can purchase pre-made templates or create your own by tracing an existing lure onto cardboard or plastic.
- Power Tools: While some steps can be done manually, having access to power tools like a drill, band saw, and belt sander will make the process easier and faster.
- Paints and Sealants: Acrylic paints are commonly used to add color and patterns to crankbaits, while epoxy or polyurethane sealants provide a protective coating.
- Hooks, Split Rings, and Treble Hooks: These components, which come in various sizes and styles, can be found at any fishing supply store.
- Crimping Tool: A crimping tool will be necessary to attach split rings to the lure body.
Now that you have all the necessary materials let’s dive into making a custom crankbait.
9 Easy Steps on How to Make Crankbaits
Step 1: Design Your Crankbait
The first step in creating your custom crankbait is to design its shape and size, critical elements influencing the lure’s action and effectiveness in the water. Consider the type of fish you target and the environments in which you typically fish. Will your crankbait be used in deep or shallow waters? Should it mimic prey fish that are long and slender or short and wide? These factors will guide your design choices.
Begin by sketching your design on paper, noting the dimensions and any distinctive features, such as the body and lip angle, which alter the crankbait’s diving depth and swimming behavior.
Remember that the body shape will affect the lure’s wobble and roll, with rounded bodies offering a vast, erratic action and slimmer designs providing a tighter, more subtle motion. If you need more clarification, you can start by replicating the dimensions of a commercially successful model and then tweak it to suit your needs better.
Step 2: Cut Out the Crankbait Body
Once you have settled on a design for your crankbait, it’s time to cut out the shape from your chosen wood. Begin by tracing your design onto the wood using a pencil or marker, ensuring that all dimensions are accurate. Secure the wood piece using a vise or clamps to keep it steady.
Using a band saw or a jigsaw, carefully cut along the outline of your design. Take your time to ensure smooth and precise cuts, as the precision of your cutting will affect the final performance and appearance of the crankbait. After cutting, use a belt sander or sandpaper to smooth out the edges and refine the shape, especially creating aerodynamic curves that will enhance the lure’s motion in the water.
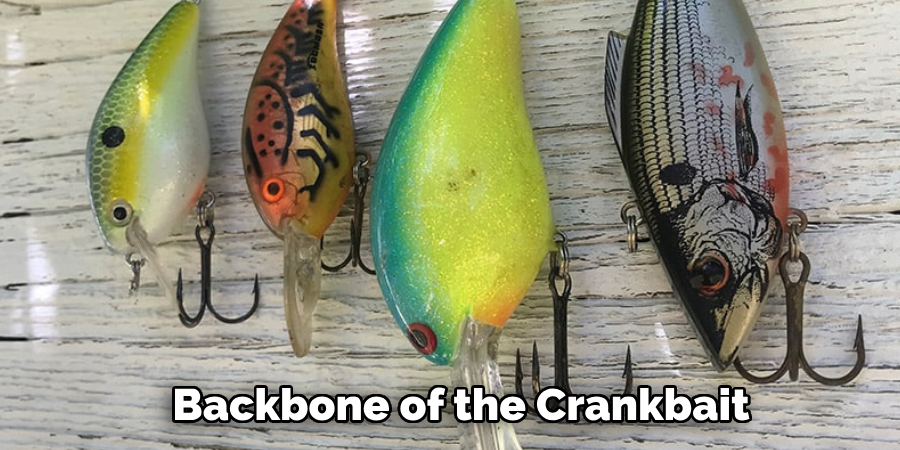
Step 3: Install the Wire Harness
The wire harness is a crucial component, as it is the backbone of the crankbait, connecting the hooks and split rings to the lure body. Begin by selecting stainless steel wire, which offers durability and rust resistance. Cut a length of wire long enough to span the size of your crankbait body, plus additional length for securing the hooks. Use a sharp tool, such as an awl or drill, to create a channel along the centerline of the crankbait body where the wire will be embedded. Carefully thread the wire through this channel, ensuring that both ends protrude from the body.
Next, using pliers, form small loops at each end of the wire. These loops will hold the split rings and hooks in place. Be sure to twist and secure the loops tightly to prevent them from coming undone.
Step 4: Shape and Fine-Tune the Body
After installing the wire harness, it’s essential to shape and fine-tune the crankbait body for optimal performance. Begin by refining the body’s contours using fine-grit sandpaper, paying close attention to smoothing out any rough edges or imperfections. This process ensures the crankbait has a streamlined and aerodynamic shape, enabling it to move enticingly through the water. While sanding, consider the balance and buoyancy of the lure, adjusting the thickness or adding weight to achieve the desired swimming action. You can insert weights into the belly of the crankbait to help it maintain stability and sink at the correct rate.
Step 5: Paint and Finish Your Crankbait
Once the body is shaped and ready, it’s time to add color and character to your crankbait. Begin by applying a primer coat to the entire surface, which helps the paint adhere better and enhances the vibrancy of the colors. After the primer has dried, use acrylic paints to create your desired color scheme and patterns.
Consider using natural hues that mimic prey fish or bold, bright colors that stand out in murky waters. Use a small brush for detailed work or stencils for consistent patterns, such as stripes or spots. Layer the paints to create depth, and allow each layer to dry thoroughly before applying the next to prevent smudging.
Step 6: Attach the Lip
The lip of the crankbait is an essential component that influences its diving depth and swimming action. Select a durable material such as polycarbonate or metal to install the lip and cut it to match the desired size and shape based on your design. The shape and angle of the lip will determine how deep the crankbait dives. Opt for a smaller, steeper lip for shallow-running lures, whereas deeper divers require a more extended, shallower lip. Use a fine-toothed saw to cut the lip material, ensuring clean, precise edges.
Next, create a slot in the front of the crankbait body where the lip will be inserted. Use a thin saw blade or a fine file to make the slot, keeping it centered and straight. Apply a small amount of strong adhesive, like epoxy, to the slot and the back edge of the lip. Carefully insert the lip into the slot, ensuring it is aligned correctly with the centerline of the crankbait. Hold it in place until the adhesive sets.

Step 7: Test and Adjust the Crankbait
After completing the construction of your crankbait, the next crucial step is testing its performance in the water. Begin by attaching split rings and hooks to the pre-formed loops on the wire harness. Then, tie the crankbait to your fishing line and perform a series of test casts into a body of water. Observe how the crankbait moves, noting its swimming action and diving depth. Pay attention to unwanted behaviors, such as rolling, listing to one side, or failing to dive correctly.
If adjustments are necessary, they can often be made on the spot. You may need to tweak the lip’s angle or re-bend the wire harness for better balance and stability. If the lure sinks too quickly or fails to maintain the desired depth, consider adjusting the added weight for better buoyancy control.
Step 8: Final Adjustments and Field Testing
Once you are satisfied with the initial performance of the crankbait in controlled conditions, it is time to conduct field testing in various fishing environments. Try casting your crankbait in different water conditions and observe its action in currents, calm waters, and varying depths. Pay attention to how the lure behaves with different retrieval speeds and angles, ensuring it remains balanced and enticing to fish. During these trials, take note of any additional adjustments needed, such as altering the lip or adjusting the weighting further.
Step 9: Maintain and Store Your Crankbait
Proper maintenance and storage are crucial for extending the life of your handcrafted crankbait. After each fishing trip, rinse your crankbait thoroughly with fresh water to remove dirt, grime, or salt residues that might have accumulated. Inspect the crankbait for any signs of wear or damage, such as chipped paint or bent wires, and make necessary repairs to ensure its effectiveness.
Apply a light coat of protective spray or oil on the hooks to prevent rusting. When storing your crankbait, keep it in a tackle box or organizer with compartments, which prevents it from getting tangled with other fishing gear. Ensure the storage area is dry and cool to avoid any moisture-related damage.
Following these steps, you can craft a high-quality and effective crankbait that will become an essential part of your fishing arsenal.

Conclusion
How to make crankbaits is a rewarding endeavor that allows you to tailor each lure to your specific fishing needs and preferences.
Throughout this guide, each step has been meticulously designed to ensure that you create a crankbait that looks appealing and performs exceptionally in the water. From shaping and painting to precise adjustments and field testing, every phase is integral to the success of your lure. As you become more experienced in crankbait making, you’ll better understand the tools, materials, and techniques that work best for your unique style and the fishing conditions you encounter.
Ultimately, the satisfaction of catching fish with handcrafted bait will enhance your fishing experience and deepen your appreciation for this intricate aspect of angling.
About the Author
Jennifer Branett is the author of Fishy Kayak and an expert in fish-related fields, with over 10 years of experience. Her work blends passion for fishing with a commitment to conservation.
Educational Background
Degree: Bachelor’s in Marine Biology
Institution: University of California, Santa Barbara
Specializations: Aquatic ecosystems, fish behavior, and sustainable practices
Professional Experience
Conservation Projects:
Collaborated with local organizations to restore aquatic habitats
Developed educational programs on sustainable fishing practices
Publications:
Authored articles for fishing magazines and environmental journals
Featured speaker at fishing expos and conservation conferences
Key Areas of Expertise
Fishing Techniques:
Kayak fishing strategies
Freshwater and saltwater fishing methods
Environmental Stewardship:
Advocacy for sustainable fishing
Promoting biodiversity in aquatic environments
Awards and Recognition
Recipient of the [Specific Award Name] for contributions to marine conservation
Recognized as a leading voice in the fishing community by [Organization/Publication Name]
Community Engagement
Workshops and Seminars:
Regularly hosts events to educate anglers on sustainable practices
Engages with youth programs to inspire the next generation of fishers
Online Presence:
Maintains an active blog sharing tips, stories, and conservation efforts
Engages with followers on social media to promote fishing ethics
Personal Interests
Enjoys kayaking in scenic locations
Passionate about photography, capturing the beauty of nature
Advocates for local conservation efforts in her community