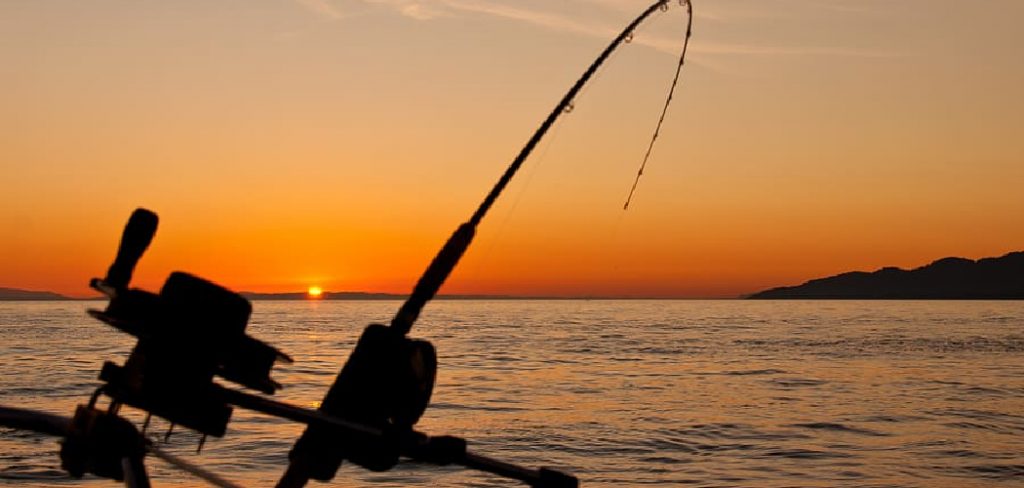
Building a downrigger can be a rewarding project for those who enjoy fishing and want to take greater control over their gear. A downrigger is a device used to control the depth of your fishing line, allowing you to target fish at specific underwater levels effectively.
Whether you’re an experienced angler or a DIY enthusiast, crafting your own downrigger is a cost-effective and customizable way to enhance your fishing experience. This guide will walk you through how to build a downrigger.
What is a Downrigger?
A downrigger is a specialized device used in fishing to enable precise control of bait or lure depth. It consists of a spool of cable or strong line, a weight (commonly referred to as a cannonball), and a release clip that holds the fishing line.
The downrigger’s main function is to lower the bait or lure to a desired depth and keep it there, making it easier to target fish that dwell at specific levels in the water column. By maintaining a consistent depth, downriggers greatly improve fishing accuracy and efficiency. They are particularly popular among anglers who fish in deep lakes or ocean environments, where traditional methods often fall short.
Benefits of Using a Homemade Downrigger
Opting for a homemade downrigger offers several advantages that can elevate your fishing experience. First and foremost, building it yourself allows for complete customization, enabling you to tailor the device to your specific fishing style, preferences, and the types of fish you aim to catch.
Additionally, constructing a downrigger can be significantly more cost-effective than purchasing a commercial model, especially when using readily available materials. A homemade downrigger also fosters a deeper connection to your gear; understanding every component ensures easier maintenance and repairs if needed. Lastly, the satisfaction and pride derived from using something you’ve built yourself add a rewarding dimension to your fishing trips.
Tools and Materials Needed
To build your own downrigger, you will need a combination of basic tools and easily accessible materials. Here’s a list to help you get started:
Tools:
- Drill and Drill Bits – Essential for creating holes in various components.
- Screwdriver – For assembling and securing parts together.
- Measuring Tape – Ensures precise measurements for an accurate build.
- Hacksaw or Metal Cutter – Useful for cutting metal rods or tubing, if required.
- Pliers – Helps with bending or securing wires and other small tasks.
- Wrench Set – For tightening bolts and other fasteners.
Materials:
- Strong Metal Rod or Tube – Forms the arm of the downrigger, which holds the cable.
- Stainless Steel Cable or Braided Fishing Line – Acts as the line to carry the weight and release clip.
- Weight (Cannonball) – A heavy sinker to keep your bait at the desired depth.
- Release Clip – Holds the fishing line and releases it when a fish strikes.
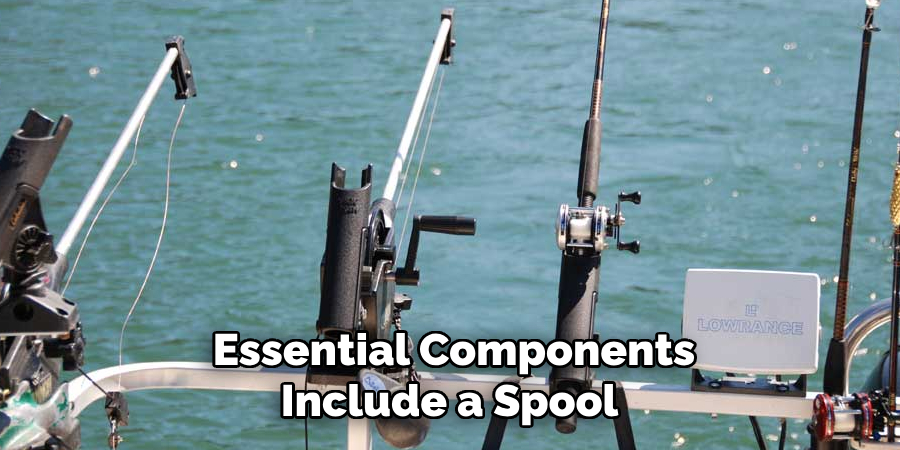
- Reel or Spool – To wind and store the cable or line.
- Mounting Bracket – Ensures the downrigger can be securely attached to your boat.
- Bolts, Nuts, and Washers – For assembling parts and securing the structure.
By gathering these tools and materials, you’ll be ready to start constructing a durable and functional downrigger step by step. Make sure to double-check for any additional items specific to your custom design.
10 Methods How to Build a Downrigger
1. Gather the Necessary Materials
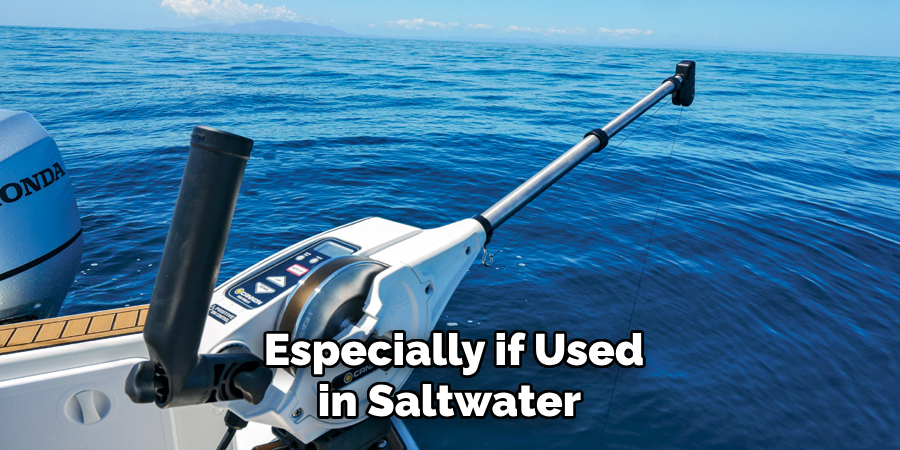
Start by assembling all the required materials for your downrigger. Essential components include a spool or reel, a sturdy arm, a weighted line, pulleys, and a release clip. Choose high-quality materials like stainless steel or aluminum for durability, especially if you’ll be using the downrigger in saltwater environments. Ensure you have the necessary tools, such as a drill, screws, and a measuring tape.
2. Design the Downrigger Structure
Before construction, sketch a design plan for your downrigger. Decide on the length of the arm and the type of base you’ll need for mounting. A longer arm is ideal for larger boats, while a shorter one works well for compact setups. Incorporate features like a manual crank or an electronic motor, depending on your preferences and budget.
3. Construct the Base
The base is the foundation of your downrigger, so it must be stable and secure. Use a flat, sturdy platform made of metal or durable plastic. Drill holes into the base to attach it to your boat using bolts or clamps. If you’re building a portable downrigger, design the base to include quick-release clamps for easy installation and removal.
4. Assemble the Arm
Next, construct the arm that will extend out from the base. Use a strong, lightweight material like aluminum tubing to create the arm. Attach the arm to the base at a slight upward angle to prevent the line from tangling or rubbing against the boat. Secure the connection with heavy-duty screws or welding for added stability.
5. Install the Pulley System
A pulley system ensures smooth deployment and retrieval of the weighted line. Attach a high-quality pulley to the end of the arm using a bracket or swivel mount. The pulley should be able to handle the weight of the line and the downrigger ball without resistance. Test its rotation to ensure it operates smoothly under load.
6. Add the Spool or Reel
The spool or reel is where the line is stored and controlled. Mount a durable spool to the base or arm, ensuring it’s easily accessible. For a manual downrigger, install a crank handle to the reel for efficient line retrieval. If you’re building an electronic downrigger, connect a motorized reel and ensure it’s properly wired to a power source.
7. Attach the Weighted Line
Select a strong, corrosion-resistant line for your downrigger, such as stainless steel cable or heavy-duty braided line. Attach one end of the line to the spool and the other end to a downrigger ball or weight. The weight should be heavy enough to keep your bait at the desired depth but not so heavy that it strains the system.

8. Incorporate a Release Clip
The release clip holds your fishing line and releases it when a fish strikes. Attach the release clip to the weighted line, positioning it just above the downrigger ball. Use an adjustable clip to accommodate different line strengths and fishing conditions. Test the release mechanism to ensure it functions reliably.
9. Test the Downrigger System
Before using your downrigger in a real fishing scenario, test it thoroughly. Mount it on your boat and deploy the line in shallow water to check for any issues. Ensure the pulley rotates smoothly, the spool functions properly, and the release clip releases the line when triggered. Make any necessary adjustments to optimize performance.
10. Maintain and Upgrade Your Downrigger
Regular maintenance is crucial for the longevity of your downrigger. Clean the components after each use, especially if you’ve been fishing in saltwater. Lubricate moving parts like the pulley and spool to prevent rust and wear. Consider upgrading parts over time, such as adding an electronic control system or a stronger release clip, to enhance functionality.
Maintenance and Upkeep
Proper maintenance ensures the longevity and optimal performance of your downrigger. After each use, rinse all components thoroughly with fresh water to remove salt, dirt, and debris, especially if used in saltwater.
Dry the system completely to prevent corrosion. Regularly inspect the downrigger for signs of wear, such as frayed cables, loose bolts, or worn pulleys, and replace any damaged parts immediately. Lubricate moving components, such as the spool, crank, and pulley, with a marine-grade lubricant to keep them operating smoothly.
Store your downrigger in a dry, secure location when not in use to protect it from the elements. If possible, detach portable units and keep them away from direct sunlight to minimize UV damage. Periodically check the electrical connections on motorized downriggers to ensure proper wiring and functionality. By adhering to a consistent maintenance routine, your downrigger will remain reliable and efficient for many fishing trips to come.
Troubleshooting Common Issues
Even with proper maintenance, you may encounter occasional issues with your downrigger. Here are some common problems and how to troubleshoot them:
1. Line Tangling or Snagging
If the line tangles during deployment or retrieval, check the alignment of the arm and pulley. Ensure the pulley is properly mounted and rotates freely. Verify that the arm is angled correctly to prevent the line from rubbing against the boat or other obstacles. Using a smoother, higher-quality line can also help minimize tangling.
2. Spool or Reel Malfunction
If the spool or reel becomes difficult to turn or jams, inspect it for dirt, debris, or corrosion. Clean it thoroughly and apply a marine-grade lubricant to moving parts. For motorized spools, check the power supply and wiring to ensure proper functionality. If the manual crank is loose or damaged, tighten the screws or replace the handle as needed.
3. Pulley Failing to Rotate
A stuck or noisy pulley can hinder the smooth operation of your downrigger. Examine the pulley for rust, dirt, or blockages that could restrict its movement. Clean it and apply lubricant to restore smooth rotation. If the pulley is damaged or worn out, replace it with a new high-quality unit.
Conclusion
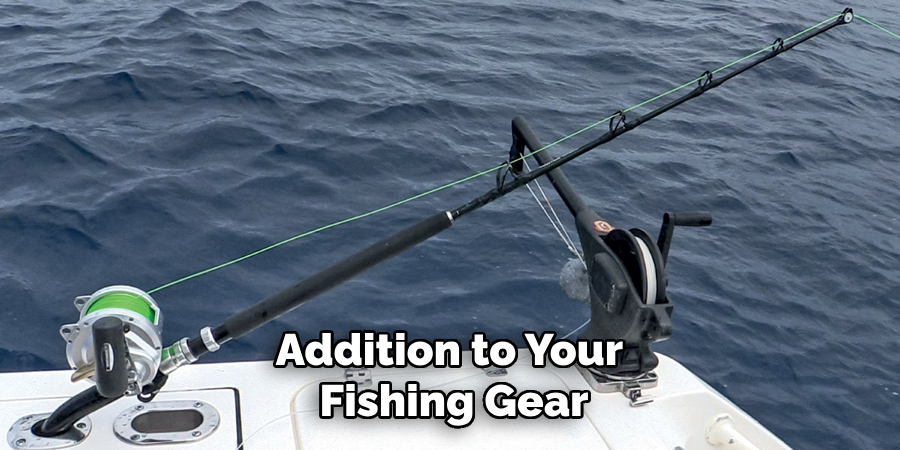
Building and maintaining a downrigger can significantly enhance your fishing experience by allowing precise control over bait depth and presentation. With careful design and assembly, your DIY downrigger can be a durable and reliable addition to your fishing gear. Thanks for reading our blog post on how to build a downrigger! We hope you found it helpful and informative.
About the Author
Jennifer Branett is the author of Fishy Kayak and an expert in fish-related fields, with over 10 years of experience. Her work blends passion for fishing with a commitment to conservation.
Educational Background
Degree: Bachelor’s in Marine Biology
Institution: University of California, Santa Barbara
Specializations: Aquatic ecosystems, fish behavior, and sustainable practices
Professional Experience
Conservation Projects:
Collaborated with local organizations to restore aquatic habitats
Developed educational programs on sustainable fishing practices
Publications:
Authored articles for fishing magazines and environmental journals
Featured speaker at fishing expos and conservation conferences
Key Areas of Expertise
Fishing Techniques:
Kayak fishing strategies
Freshwater and saltwater fishing methods
Environmental Stewardship:
Advocacy for sustainable fishing
Promoting biodiversity in aquatic environments
Awards and Recognition
Recipient of the [Specific Award Name] for contributions to marine conservation
Recognized as a leading voice in the fishing community by [Organization/Publication Name]
Community Engagement
Workshops and Seminars:
Regularly hosts events to educate anglers on sustainable practices
Engages with youth programs to inspire the next generation of fishers
Online Presence:
Maintains an active blog sharing tips, stories, and conservation efforts
Engages with followers on social media to promote fishing ethics
Personal Interests
Enjoys kayaking in scenic locations
Passionate about photography, capturing the beauty of nature
Advocates for local conservation efforts in her community