Are you looking to catch more fish and improve your finesse fishing techniques? Look no further than the shaky head rig!
How to rig a shaky head is a popular and effective technique in bass fishing, particularly for enticing finicky fish in tough conditions. The shaky head rig involves a jig head with a straight or lightly curved soft plastic worm attached, allowing the bait to stand upright and quiver provocatively on the bottom.
This subtle presentation is designed to mimic a baitfish or worm, making it especially appealing to bass lurking near the bottom or in the cover. Ideal for both beginners and seasoned anglers, this technique is versatile and can be adapted to various water conditions and structures.
Understanding the components and mastering the setup are crucial steps in successfully rigging a shaky head, and they can significantly increase your catch rate.
What Will You Need?
To rig a shaky head, you will need the following items:
- A jig head (1/16 to 3/8 ounce)
- A soft plastic worm (4 to 7 inches in length)
- Fishing line (6 to 10-pound test)
- Scent or attractant
- Glass bead for extra noise and vibration
Once you have gathered these items, you can start rigging your shaky head!
10 Easy Steps on How to Rig a Shaky Head
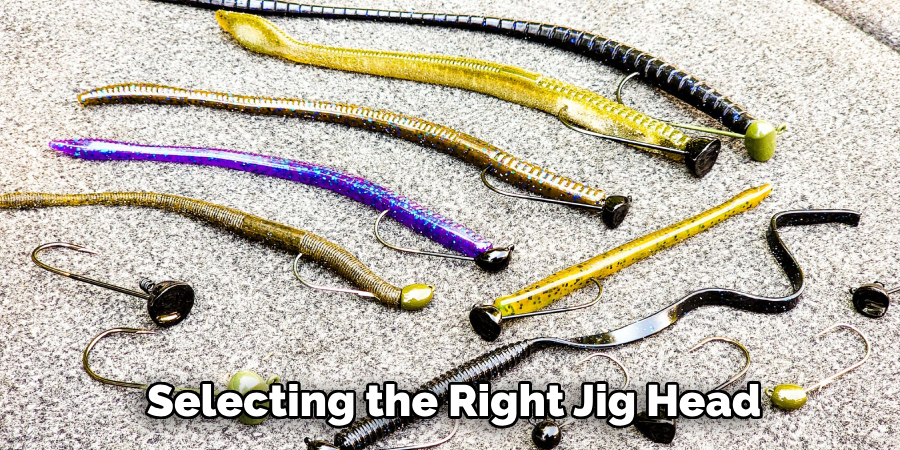
Step 1. Select the Right Jig Head:
When selecting the right jig head for your shaky head rig, consider the weight and the shape. The weight of the jig head is vital as it determines how quickly your bait will sink and how it moves in the water. Lighter jig heads ranging from 1/16 to 1/8 ounce are ideal for shallower waters and a slow fall, providing a more finesse presentation. Heavier jig heads, from 1/4 to 3/8 ounce, are better suited for deeper waters or when fishing in windy conditions, as they help maintain better contact with the bottom.
The shape of the jig head also plays a crucial role in how the bait stands on the bottom. Shaky heads with a flat or stand-up design help keep the worm upright, enhancing its natural quivering action. This is key to enticing bass, as the standing worm imitates an easy meal that’s hard for fish to resist.
Step 2. Choose the Right Soft Plastic Worm:
Selecting the right soft plastic worm is essential to maximizing the effectiveness of your shaky head rig. The worm’s size, color, and action can significantly influence your success. Generally, worms between 4 to 7 inches are the most effective, with smaller sizes more suitable for clear waters or when fish are particularly finicky.
Consider the water color and clarity when choosing your worm color; natural hues like green pumpkin or watermelon are versatile options, while brighter colors can be effective in stained or muddy waters. Additionally, look for worms with a straight or slightly tapered body to enhance the natural, trembling action that attracts bass. This lifelike movement, paired with the right color, can make your shaky head rig irresistible to curious fish.
Step 3. Tie the Knot:
Once you’ve selected your jig head and soft plastic worm, the next crucial step is to secure your jig head to the fishing line using a suitable knot. The Improved Clinch Knot is a popular choice for this rig because of its strength and reliability. To tie this knot, thread the end of the line through the eye of the jig head and make five to six twists around the standing line.
Then, pass the end of the line back through the loop near the eye and through the big loop you just formed. Moisten the knot and pull it tight, trimming any excess line. Ensuring your knot is secure will prevent any tackle loss or potential catches while fishing.
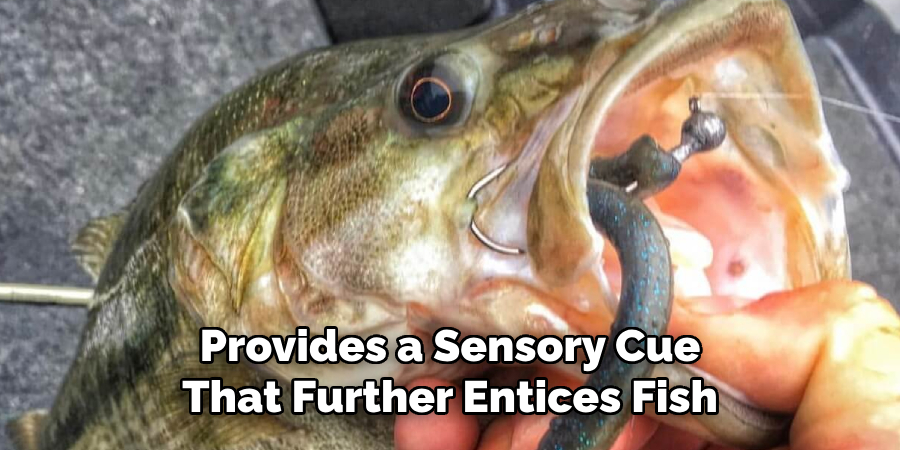
Step 4. Add Attractant or Scent:
Enhancing your shaky head rig with a scent or attractant can make a significant difference in convincing hesitant bass to bite. Applying scent to your soft plastic worm provides a sensory cue that further entices fish. Choose a scent that mimics the natural prey of bass, such as garlic, crawfish, or shad, as these are commonly found scents that appeal to bass.
Simply apply a small amount of attractant to the entire length of the worm, ensuring it is evenly coated. This added scent camouflages unnatural odors and encourages bass to hold onto the bait longer, giving you more time to set the hook.
Step 5. Thread the Worm onto the Jig Head:
Threading the worm onto the jig head properly is vital for creating the most natural presentation of the shaky head rig. Begin by inserting the tip of the hook into the worm’s center and pushing it through for about a quarter of an inch. Next, exit the hook point through the side of the worm, pull it up to the jig head, and rotate the worm around so it aligns with the hook’s shank. Finally, reinsert the hook into the worm’s body so that the point is embedded or just barely protruding.
Step 6. Ensure Proper Alignment:
Achieving the correct alignment of your worm on the jig head is critical to maintaining its natural action and appearance. Once you’ve threaded the worm, check to see if it lays straight along the hook’s shank without any kinks or twists. A well-aligned worm will ensure the most effective quivering motion as it stands upright in the water. If the worm appears crooked or bunched, carefully adjust it by slightly repositioning it or re-threading it for a smoother presentation.
Step 7. Use a Glass Bead for Added Attraction:
Incorporating a glass bead into your shaky head rig can enhance its appeal by introducing additional noise and vibration. To add a glass bead, slide it onto your fishing line before tying it on the jig head. The bead should sit between the knot and the jig head, allowing it to move freely as you retrieve the line.
This movement, combined with the bead’s hard surface, creates subtle clicking sounds and vibrations that mimic the movement of prey on the substrate, drawing attention from nearby bass. The glass bead can also act as a visual cue, especially when selected in a contrasting color to your soft plastic worm, increasing the overall presentation impact of your shaky head rig.
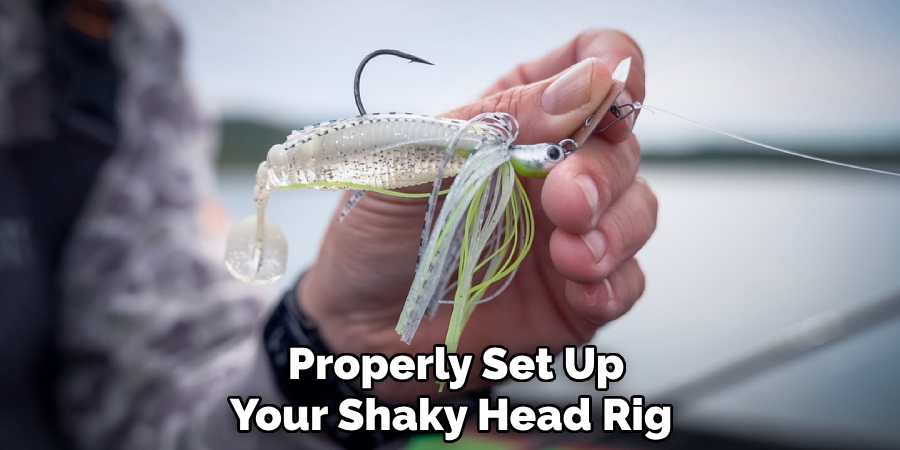
Step 8. Cast and Retrieve:
Having properly set up your shaky head rig and knowing how to cast and retrieve it effectively is essential for maximizing your catch potential. Start by casting your rig to the desired location, allowing it to settle to the bottom naturally. Once on the bottom, use a slow and steady retrieve, incorporating small shakes and pauses to mimic a worm’s or distressed prey’s natural movement.
Be attentive to any changes in resistance or sudden movements, as these could indicate a fish taking interest. Varying the speed and technique of your retrieve can help you determine what the fish are responding to best on a given day. Experimenting with different retrieval patterns will enhance your adaptability and success in different fishing environments.
Step 9. Setting the Hook:
Successfully setting the hook is critical in ensuring your catch does not escape once a bass takes your shaky head rig. As you feel a tap or sudden resistance on the line, remain calm and poised. Avoid jerking the rod immediately, as this can sometimes pull the lure away from the fish. Instead, pause slightly to allow the fish to take the worm fully. Once you sense the fish is committed, swiftly raise your rod tip to securely drive the hook into the fish’s mouth.
A firm yet controlled motion helps to lodge the hook without tearing it out. Keeping constant pressure on the line is crucial to maintaining your hookset throughout the fight, guiding the fish in, and ensuring a successful landing.
Step 10. Reel in Your Catch:
Once you’ve successfully set the hook and felt the weight of the bass on the other end, the next step is to reel in your catch effectively. Maintain steady pressure on the line while playing the fish, being mindful not to allow slack, which could lead to the hook dislodging. Use a combination of reeling and controlled rod maneuvers to guide the bass toward your position.
If the fish is making strong runs, allow your reel’s drag system to do its job, preventing line breakage. Keep your rod tip high as the bass approaches to leverage its movement, and prepare to scoop it up with a net if needed.
Following these steps and tips for fishing with a shaky head rig can improve your chances of catching bass in any body of water. This rig’s versatility and effectiveness make it a go-to choice for many anglers, especially in challenging fishing conditions.
Conclusion:
How to rig a shaky head offers anglers a strategic approach to fishing, especially when targeting bass in diverse environments.
The meticulous process behind each step—from selecting the right equipment and applying attractant scents to threading the jig head and employing precise retrieval techniques—enhances the rig’s effectiveness. By understanding and implementing these steps, you increase your odds of consistently attracting and landing bass.
The shaky head rig’s adaptability makes it a versatile choice, capable of tempting fish even under tough conditions. Investing time in mastering this rig boosts your confidence and enriches your overall fishing experience.
About the Author
Jennifer Branett is the author of Fishy Kayak and an expert in fish-related fields, with over 10 years of experience. Her work blends passion for fishing with a commitment to conservation.
Educational Background
Degree: Bachelor’s in Marine Biology
Institution: University of California, Santa Barbara
Specializations: Aquatic ecosystems, fish behavior, and sustainable practices
Professional Experience
Conservation Projects:
Collaborated with local organizations to restore aquatic habitats
Developed educational programs on sustainable fishing practices
Publications:
Authored articles for fishing magazines and environmental journals
Featured speaker at fishing expos and conservation conferences
Key Areas of Expertise
Fishing Techniques:
Kayak fishing strategies
Freshwater and saltwater fishing methods
Environmental Stewardship:
Advocacy for sustainable fishing
Promoting biodiversity in aquatic environments
Awards and Recognition
Recipient of the [Specific Award Name] for contributions to marine conservation
Recognized as a leading voice in the fishing community by [Organization/Publication Name]
Community Engagement
Workshops and Seminars:
Regularly hosts events to educate anglers on sustainable practices
Engages with youth programs to inspire the next generation of fishers
Online Presence:
Maintains an active blog sharing tips, stories, and conservation efforts
Engages with followers on social media to promote fishing ethics
Personal Interests
Enjoys kayaking in scenic locations
Passionate about photography, capturing the beauty of nature
Advocates for local conservation efforts in her community