Anglers all over the world use a variety of knots in their fishing adventures. One simple yet effective knot is the Duncan loop. It’s a type of slip knot used for tying flies and lures. What makes the Duncan loop so popular is its structure, which makes it easy to adjust the size of the loop.
Many anglers find it to be the perfect knot for trout fishing. But how do you tie a Duncan loop? In this article, we’ll guide you through the process of how to tie a duncan loop and give you some tips to make it even better.
Can You Tie a Duncan Loop?
Fishing can be a relaxing and rewarding hobby to take up. However, it may seem intimidating for beginners unfamiliar with the different types of knots used in fishing. One of these knots is the Duncan Loop, also known as the Uni Knot. The Duncan Loop is a versatile knot that is frequently used in fishing because of its ability to provide strength and reliability.
It has proven to be especially useful in freshwater fishing. This knot can be tied under various conditions, including windy or low-light circumstances. Tying the Duncan Loop can be a valuable skill to add to your fishing repertoire. With practice, you’ll be able to rest assured that your line is secure and focus on the thrill of reeling in your next catch.
Why Should You Tie a Duncan Loop?
Fishing is an activity that many people enjoy, whether it’s with friends or for solace. It is the perfect opportunity to unwind and just enjoy nature. Preparing your gear for fishing is an incredibly important aspect that can directly impact your experience. Using the right equipment can be the difference between a successful day on the water or going home empty-handed. This is where the Duncan Loop comes in!
By using a Duncan Loop, you’ll be able to tie a fishing line to a lure precisely and securely. This technique ensures that the line stays in place and doesn’t slide around while in the water. The Duncan Loop is one of the easiest knots to tie and is sturdy enough to handle the weight of big fish.
Regardless of whether you are a novice or a seasoned fisherman, it’s essential to use the right knots to ensure success. Incorporating this knot into your routine will substantially improve your next fishing adventure!
How to Tie a Duncan Loop for the Best Fishing Experience
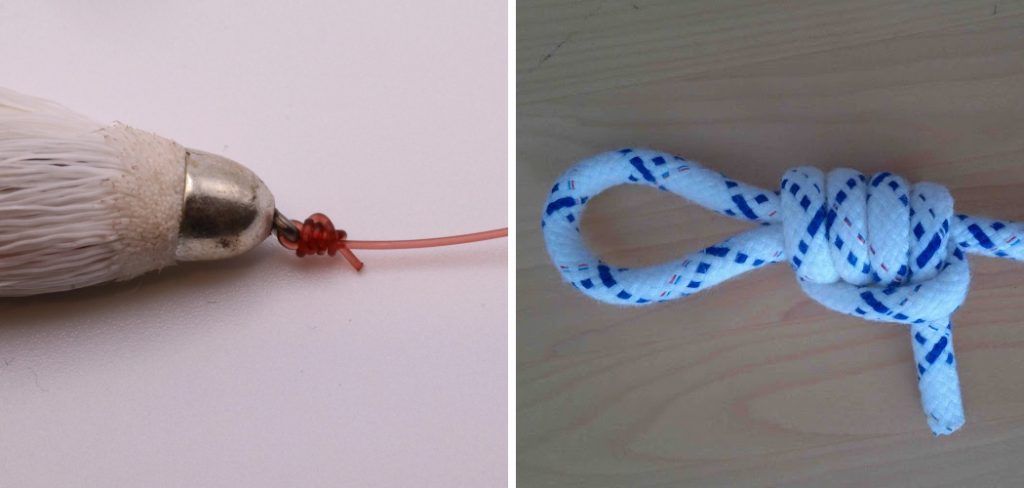
1. Tie a Small Overhand Knot
To start, tie a small overhand knot at the end of the cord. This knot will act as a stopper. Then, pass the tag end of the cord through the eye of the hook from the front, leaving a long tag end.
The tag end is the end of the cord that hangs off the hook, while the standing end is the other end of the cord. Fold the remaining length of the tag end over the top of the standing end, creating a loop.

2. Take the Tag End and Wrap It Tightly
Next, take the tag end and wrap it tightly around the standing end and the loop at least five times. Make sure that the loops are tight and close to each other, but be careful not to create a knot. After wrapping the loops, take the end of the tag and pass it through the loop near where the cord has come out of the eye of the hook. The loop should now be pulled tight, touching the knot you made initially.
3. Moisten the Knot
The next step is to moisten the knot a bit and pull on the cord’s standing end. This will help to tighten the knot and make it more secure. Keep pulling until the knot slides up onto the eye of the hook. This is where you’ll notice the loop that you’ve created. Once the knot is in place, you can use your fingers to slide the loop up or down to adjust the size of the loop. Ensure to wet the knot again and pull on the standing end until it is tight.
4. Tighten the Loop
To tighten the loop, hold onto the standing end of the cord with one hand and use your other hand to push down on the top of the knot. This will create pressure and cause the loop to tighten around the eye of the hook. Keep pushing until you get a tight and secure loop. If the loop is too large, you can adjust it by pulling on the standing end or by using your fingers to slide the knot up or down.
5. Wet and Tighten Again
Once you have tightened the loop, make sure to wet the knot again and pull on the standing end until it is tight against the eye of the hook. This will ensure the knot is secure and will not slip or come undone while fishing.
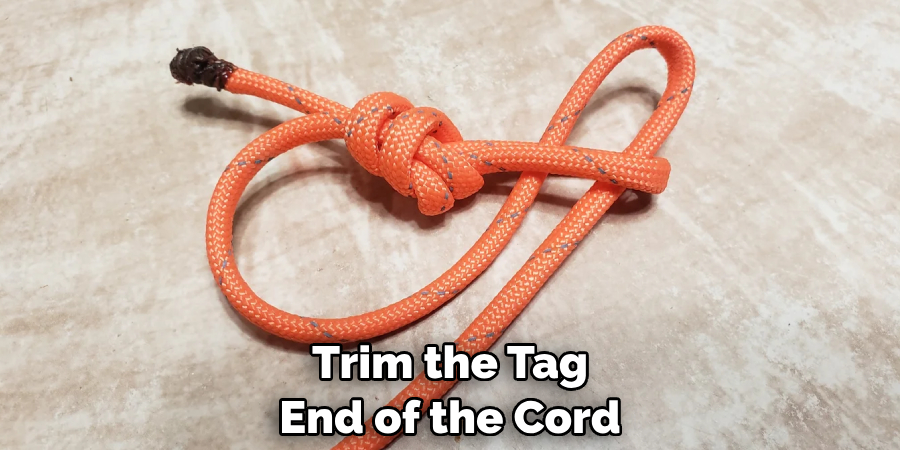
6. Trim the Tag End
After you have completed all of these steps, it’s time to trim the tag end of the cord. You can cut it close to the knot, leaving only a small amount hanging off. Make sure that there is enough left to easily untie the knot if needed.
7. Practice Makes Perfect
As with any new skill, practice makes perfect when it comes to tying a Duncan Loop. Don’t get frustrated if your first few attempts fail perfectly – keep practicing until you feel comfortable and confident in tying this useful loop knot. You can also watch instructional videos or seek guidance from experienced fishermen or friends familiar with this knot.
With enough practice, you’ll be able to tie a Duncan Loop quickly and efficiently, making it an essential part of your fishing techniques. So grab some cord or fishing line and start practicing today! Remember to always wet the knot and pull tightly for the best results.
5 Considerations Things When You Need to Tie a Duncan Loop
1. Type of Fishing Line
The type of fishing line you use can greatly impact the success of your Duncan Loop knot. This knot is best suited for monofilament or fluorocarbon lines, as they are more flexible and easier to manipulate. Braided lines may be too stiff and difficult to tie with this knot.
2. Size of Hook or Lure
When tying a Duncan Loop, it’s important to consider the size of your hook or lure. This knot works best with smaller hooks and lures, as larger ones may not fit through the loop easily. If using a larger hook or lure, you may need to adjust the size of your loop accordingly.
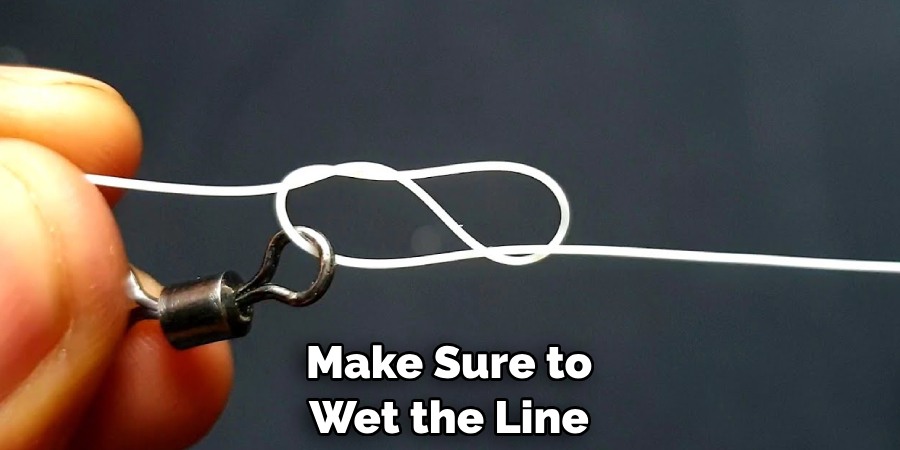
3. Wetting the Line
Before tying any knot, it’s important to wet the line first. This helps reduce friction and makes it easier to tighten the knot properly. When tying a Duncan Loop, make sure to wet the line before creating the loop and throughout the entire process.
4. Number of Twists in Loop
The number of twists in your loop can also affect the strength and reliability of your Duncan Loop knot. Generally, 3-5 twists in the loop are recommended for optimal results. Too few twists may result in a weak knot, while too many twists can make it difficult to tighten properly.
5. Proper Tightening Technique
Properly tightening your Duncan Loop is crucial for ensuring its strength and effectiveness when fishing. After creating your loop and passing it through the eye of your hook or lure, hold onto both ends of your line while pulling on the tag end to tighten the knot completely before trimming off the excess line.
Benefits of Tie a Duncan Loop
A Duncan Loop is a knot that is commonly used by anglers when fishing with a lure or fly. It is an incredibly useful and versatile knot that can be used to attach a fishing line to a hook, lure, or fly in a way that ensures it won’t accidentally slip off while reeling in a catch.
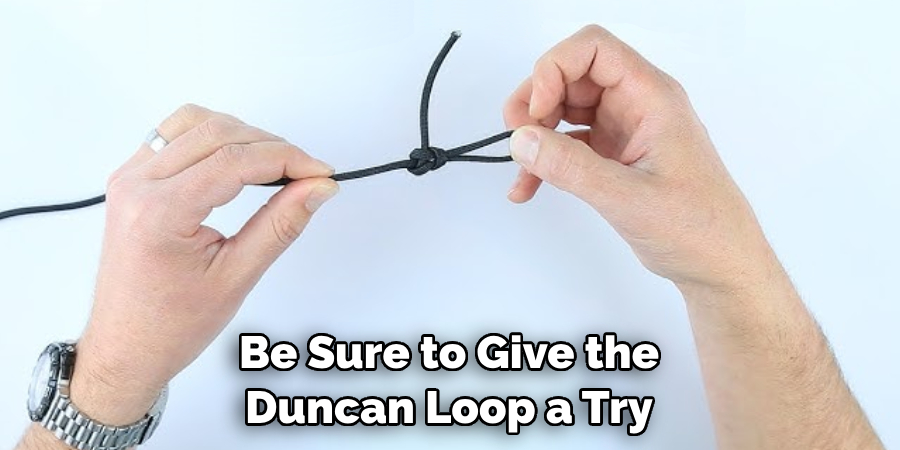
One of the biggest benefits of tying a Duncan Loop is that it allows for increased movement of the bait or fly, which can make it more enticing to fish and increase the chances of a successful catch.
Additionally, the knot is relatively easy to tie and can be done quickly, making it an essential knot for any angler’s repertoire. So, the next time you’re getting ready to go fishing, be sure to give the Duncan Loop a try and see how it can improve your fishing experience.
Conclusion
Tying a Duncan loop is simple, quick, and easy. It’s an excellent knot for anyone starting in fishing and a go-to knot for seasoned anglers. It allows lures and flies to move freely in the water, which can be a great attraction for fish.
Following our guide, you can tie the perfect Duncan loop in no time. Just remember to moisten the knot before tightening it and adjust the size of the loop as needed. Before you know it, you’ll be using the Duncan loop like an expert and catching all kinds of fish on your next fishing trip. Thanks for reading our post about how to tie a duncan loop.
About the Author
Jennifer Branett is the author of Fishy Kayak and an expert in fish-related fields, with over 10 years of experience. Her work blends passion for fishing with a commitment to conservation.
Educational Background
Degree: Bachelor’s in Marine Biology
Institution: University of California, Santa Barbara
Specializations: Aquatic ecosystems, fish behavior, and sustainable practices
Professional Experience
Conservation Projects:
Collaborated with local organizations to restore aquatic habitats
Developed educational programs on sustainable fishing practices
Publications:
Authored articles for fishing magazines and environmental journals
Featured speaker at fishing expos and conservation conferences
Key Areas of Expertise
Fishing Techniques:
Kayak fishing strategies
Freshwater and saltwater fishing methods
Environmental Stewardship:
Advocacy for sustainable fishing
Promoting biodiversity in aquatic environments
Awards and Recognition
Recipient of the [Specific Award Name] for contributions to marine conservation
Recognized as a leading voice in the fishing community by [Organization/Publication Name]
Community Engagement
Workshops and Seminars:
Regularly hosts events to educate anglers on sustainable practices
Engages with youth programs to inspire the next generation of fishers
Online Presence:
Maintains an active blog sharing tips, stories, and conservation efforts
Engages with followers on social media to promote fishing ethics
Personal Interests
Enjoys kayaking in scenic locations
Passionate about photography, capturing the beauty of nature
Advocates for local conservation efforts in her community