Are you seeking a robust and reliable knot to tie your fishing line? If so, then the Double Uni Knot is just what you need!
How to tie double uni knot is a valuable skill for anglers of all levels, as it is widely used to join two lines of different diameters or materials. Known for its strength and reliability, the double uni knot is trendy in fishing because it can withstand significant tension without slipping. This knot is relatively easy to master with some practice, making it an essential addition to any angler’s repertoire.
The following guide will walk you through the step-by-step process of tying a double uni knot, ensuring a secure and dependable connection for your fishing lines.
What Will You Need?
To tie a double uni knot, you will need the following materials:
- Two fishing lines of different diameters (e.g., a leader line and a mainline)
- Scissors or nail clippers to trim excess line
Once you have gathered these materials, let’s begin tying the knot!
10 Easy Steps on How to Tie Double Uni Knot
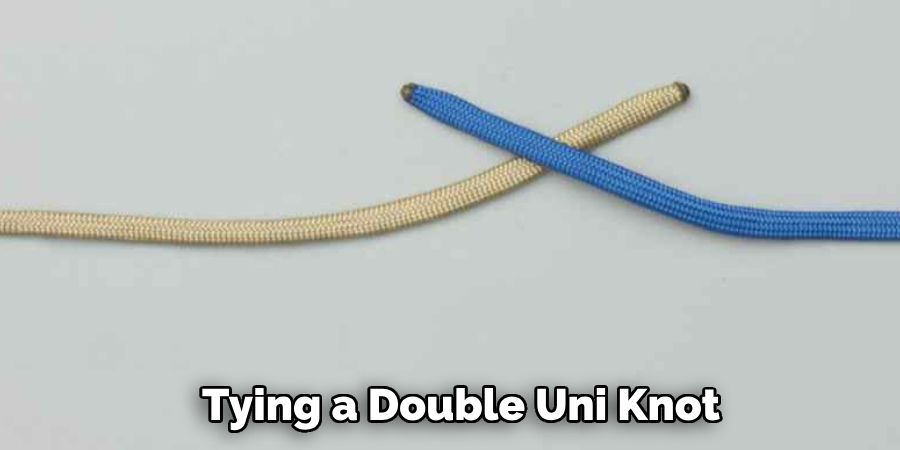
Step 1. Overlap the Lines:
To begin tying a Double Uni Knot, carefully align the end of the two fishing lines you intend to join. Ensure the lines overlap by about six to eight inches, providing sufficient length to create the knot securely. This initial step is crucial because it ensures adequate material is available to form the coils required for the double uni knot. Maintaining consistent tension while overlapping the lines will help achieve better control and precision as you proceed with the subsequent steps. This technique sets the stage for an efficient and robust connection, preparing the lines for the subsequent knot-making process.
Step 2. Create the First Loop:
After ensuring the lines are overlapped properly, use your thumb and forefinger to securely hold the point of overlap. With the tag at the end of the first line, form a simple loop, crossing it back over both lines.
This loop will serve as the foundation for wrapping the line around itself, which is fundamental to the muscular structure of the double uni knot. Be sure to leave a short tail, about 4 to 6 inches, as this will be used to wind around the lines in the following step. The size of the loop is optional as long as it grants enough space to make the necessary wraps in the next stage. Pay attention to the tension in the line, keeping it taut but not overly tight, allowing for a more streamlined knot formation.
Step 3. Wrap the Line Around:
Now, take the tag end of the line, which you used to create the loop, and wrap it around both lines. Make 4 to 6 turns around the double lines, ensuring each wrap is snug and evenly spaced. This wrapping action helps to bind the lines together, providing the essential grip and structure to the knot. As you wrap, maintain a firm grip on the loop’s center with your thumb and forefinger, which will help keep the wraps from slipping out of place. Once the desired number of wraps is completed, hold the tag end securely in place to prevent any loosening and prepare to move to the next step for completing the first side of the knot.
Step 4. Tighten the First Knot:
After wrapping the line, it’s time to tighten the first section of the Double Uni Knot. Gently but firmly pull on the tag end of the line, making sure the wraps cinch down onto the standing line without gaps. It’s important to apply steady tension while coaxing the wraps towards each other for a compact knot. Once the wraps are securely pressed together, the finished knot should resemble a neatly aligned coil. Avoid pulling too hastily, as this could unbalance the wraps or cause the lines to slip. The goal is to achieve a tight, compact knot that maintains its integrity under tension.
Step 5. Create the Second Loop:
To begin forming the second half of the Double Uni Knot, switch your focus to the other end of the overlapped lines. Use the tag at the end of the second line and form a similar loop, crossing it over both lines as you did previously. Ensure the loop’s size accommodates the necessary wraps and leaves a tail of about 4 to 6 inches. This will be the basis for wrapping, creating a symmetrical knot on both sides. As you form the loop, maintain moderate tension, setting up the conditions to quickly execute tight and orderly wraps in the following step.
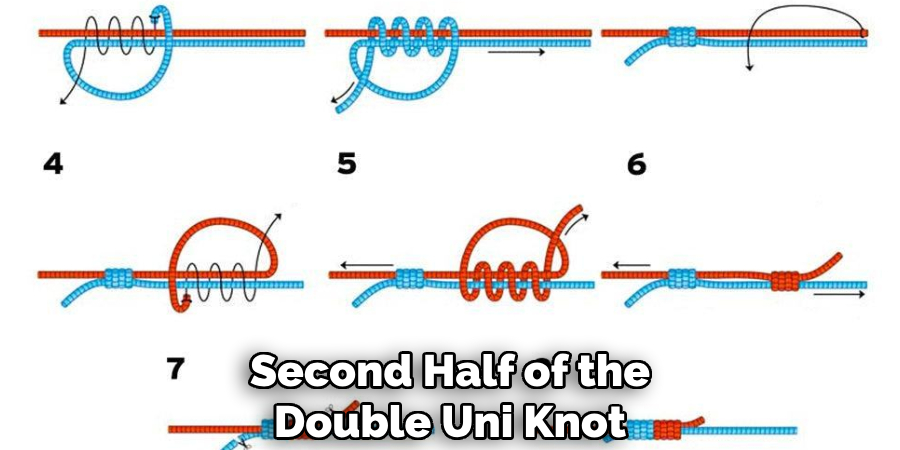
Step 6. Wrap the Line Around for the Second Knot:
With the loop secured, take the tag at the end of the second line and wrap it around both lines. Like the first side, make 4 to 6 turns around the overlapped lines, ensuring each turn is close and snug. The objective is to mirror the initial wrapping process to maintain balance and symmetry within the knot. Keep a consistent tension as you make the wraps, carefully aligning each one next to the last to build a firm connection. Once the desired wraps are completed, hold the tag end steady, ensuring that no wraps shift or loosen, maintaining the knot’s overall structure and strength. This will prepare the knot to be tightened similarly to the initial half.
Step 7. Tighten the Second Knot:
To ensure the integrity of the Double Uni Knot, it’s crucial to tighten the second half properly. Gently pull on the tag end of the second line while keeping the main lines steady. As the wraps compress against one another, adjust them if necessary to eliminate any gaps. The objective is to create a tightly bound, compact knot that mirrors the first half. Careful tension management during this step is essential to prevent distortion or sliding of the wraps. Once the knot is sufficiently tightened, visually inspect it for uniformity and strength, ensuring that both halves exhibit a consistent pattern of snug coils. With both knots tightened you’re almost ready to complete the process.
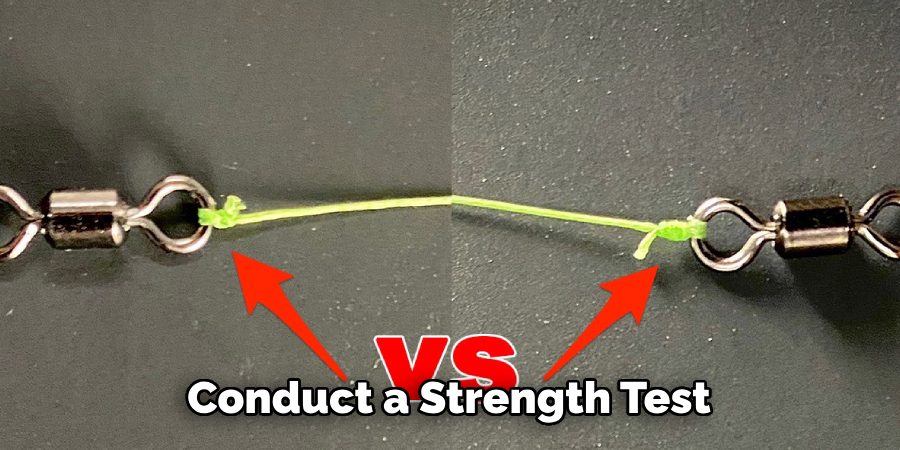
Step 8. Test the Strength:
To confirm the Double Uni Knot’s effectiveness, conduct a strength test. Gently tug on both main lines simultaneously in opposite directions. This test simulates the strain the knot might face under real-world conditions when fishing. A well-tied Double Uni Knot should hold firm with no signs of slipping or unraveling. If the knot remains intact and resilient under this pressure, it has been tied correctly. However, if slipping occurs, consider retightening or retying the knot to ensure it meets the necessary strength requirements. Continuously testing knots for reliability is a smart practice for maintaining gear integrity and successfully landing catches.
Step 9. Trim the Tag Ends:
Once the Double Uni Knot has been tightly secured and tested for strength, the final step is to trim the tag ends. Use scissors or a line cutter to carefully snip off the excess length from each tag, leaving about a 1/8 to 1/4 inch tail. This ensures that the knot remains streamlined and reduces the likelihood of the tag ends catching on obstacles or causing line friction during casts. However, avoid cutting too close to the knot, as a small amount of the tag ends helps preserve the knot’s security under tension. Your Double Uni Knot is fully completed and ready for action with the tag ends properly trimmed.
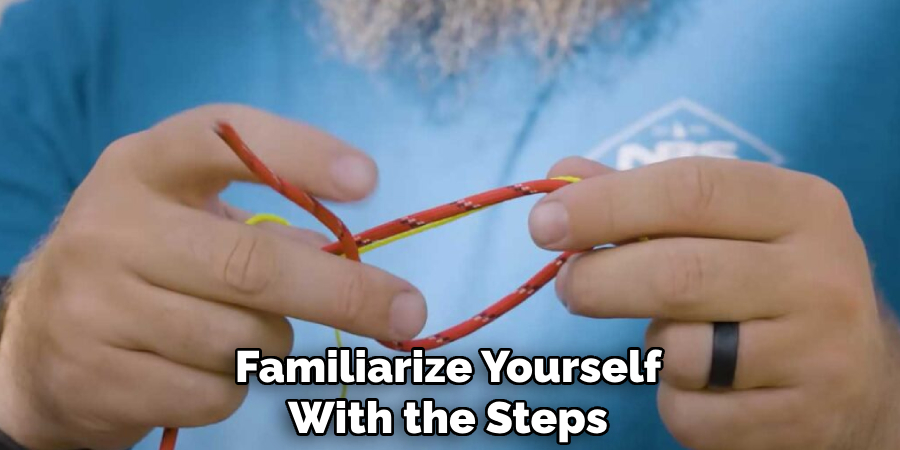
Step 10. Practice and Master the Technique:
Achieving consistency and efficiency in tying the Double Uni Knot requires practice. Familiarize yourself with the steps until they become second nature, ensuring each knot is tied correctly under various conditions. Spend time practicing in different settings to develop muscle memory, enhancing your ability to execute the knot quickly and accurately, even in less-than-ideal weather or lighting. Mastering this skill not only boosts confidence but also ensures that your fishing line is always securely connected, minimizing the risk of losing a catch due to knot failure. Regular practice is vital to honing your knot-tying proficiency and achieving optimal performance on the water.
By following these steps and continuously practicing, you can confidently tie the Double Uni Knot for a variety of fishing scenarios.
5 Things You Should Avoid
- Using the Wrong Line Types: Ensure that you use compatible lines, such as monofilament or braided lines, that knot well together. Using incompatible lines can result in solid or successful knots.
- Improper Line Overlap: Ensure the lines overlap sufficiently before tying the knots. Insufficient overlap can lead to the knot slipping or failing under tension.
- Not Wetting the Knots: Always moisten the lines before tightening the knots. This reduces friction and prevents the lines from burning, which weakens the knot.
- Incorrect Knot Tension: When pulling the knots tight, ensure even and consistent tension. Uneven pressure can weaken the knot and make it more prone to unraveling.
- Neglecting to Trim Excess Line Ends: After tying the double uni knot, always trim the excess line ends close to the knot. Long tag ends can get caught or tangled with other lines or objects.
Conclusion
How to tie double uni knot can be a straightforward process if these key considerations are kept in mind. By paying close attention to line compatibility and maintaining proper overlap, you ensure the foundational strength of your knots.
Moistening the lines before tightening is crucial to minimize friction, safeguarding against potential damage and preserving knot integrity. Equally important is applying consistent tension while tightening and trimming excess ends once the knot is secure.
By following these steps, you can confidently tie a reliable double uni knot that withstands fishing demands. Practice regularly to perfect your technique; with time, knot tying will become a seamless and intuitive part of your fishing routine.
About the Author
Jennifer Branett is the author of Fishy Kayak and an expert in fish-related fields, with over 10 years of experience. Her work blends passion for fishing with a commitment to conservation.
Educational Background
Degree: Bachelor’s in Marine Biology
Institution: University of California, Santa Barbara
Specializations: Aquatic ecosystems, fish behavior, and sustainable practices
Professional Experience
Conservation Projects:
Collaborated with local organizations to restore aquatic habitats
Developed educational programs on sustainable fishing practices
Publications:
Authored articles for fishing magazines and environmental journals
Featured speaker at fishing expos and conservation conferences
Key Areas of Expertise
Fishing Techniques:
Kayak fishing strategies
Freshwater and saltwater fishing methods
Environmental Stewardship:
Advocacy for sustainable fishing
Promoting biodiversity in aquatic environments
Awards and Recognition
Recipient of the [Specific Award Name] for contributions to marine conservation
Recognized as a leading voice in the fishing community by [Organization/Publication Name]
Community Engagement
Workshops and Seminars:
Regularly hosts events to educate anglers on sustainable practices
Engages with youth programs to inspire the next generation of fishers
Online Presence:
Maintains an active blog sharing tips, stories, and conservation efforts
Engages with followers on social media to promote fishing ethics
Personal Interests
Enjoys kayaking in scenic locations
Passionate about photography, capturing the beauty of nature
Advocates for local conservation efforts in her community